Tuesday, April 12, 2011

BBQ Lasagne!?

BBQ a lasagne!? Sure you can! I used a cast iron casserole dish and made my lasagne like I normally do. Next time, the only thing I'd change, would be to pre-cook the noodles (my usual recipe calls for un-cooked pasta) and cover with foil to avoid being on the grill too long. The edges and underside burned a bit but I think that if I make the changes above that should take care of the burning. If the noodles are pre-cooked it should only take about 20-30 minutes on the grill.

Always turn off your grill before reaching for the pan and double up on the potholders. Cast iron gets really, really hot. I am super excited about this because now I can "bake" in the summer without heating up the house!

Saturday, August 21, 2010

Octopus Hot Dogs!

Start by slicing an uncooked hot dog in half, but only halfway up the length.

Turn it and slice it again, you should now have four legs!


Take each leg individually and slice that one in half. Do the same
with the other three.


Next, throw em in a pot of boiling water, I usually boil them for about 10 minutes.


The hot water makes the legs curl up slightly. And there you have it! A hot dog octopus in a sea of Mac n' Cheese!


Thursday, July 29, 2010

Don't Buy Shorts!


You can easily stretch the life of a pair of jeans by making them into shorts. When your kids tear the knees or they get too short but the waist still fits cut the legs off and stitch a hem. This is especially nice because you can choose how short you want the shorts to be.


Start by cutting one of the legs off just above the tear (or however short you want them), next, fold them over.


You will want to make sure that the waist lines up, otherwise the legs won't match. Then, cut off the second leg.


Zig-zag stitch the bottom of the short legs. This will keep them from fraying.
Turn them inside out and pin the edges up. 
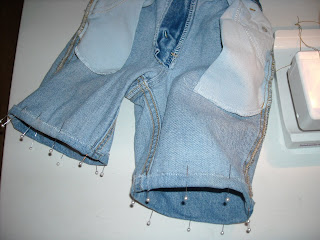
Stitch the hems with jean grade thread and viola!


Saturday, May 29, 2010

Bread Heels

For some reason, I just can't eat the heels of a loaf of bread. I'd rather just not eat than to have to eat a sandwich made of heels.

I also don't like to waste.

Every time I threw away the heels I cringed. So...finally, after years and years of throwing them out (sometimes I'd save them to feed to ducks) I came up with a way to eat them where you can't tell that they are heels!

Breakfast Caserole dishes!

Basically, I keep a bread bag in my freezer and add the heels as I come across them. When I have six ends stored up I just whip up a breakfast caserole! AND you can't tell that it was made with heels!

Thursday, May 20, 2010

Food Pyramid Magnets!

This is a project that I came up with, with the help of my awesome co-leader, to take the place of option #5 for the "Eat Right, Stay Healthy" Try-It. These are also a great recycle project for the girls! Start with 6 tops and bottoms from frozen juice cans. It's important to use this type because they are nice and smooth and have no risk of cutting a little one's fingers.

Using E6000 glue on some strong magnets, I prefer to just pay a little more to get a good quality magnet so they actually stay on the refrigerator. Glue them on the night (or sooner) before your meeting. The glue has toxic fumes and not good for pregnant women or children to breathe. Please, don't use hot glue, it is sure to pop off over time.
At the meeting, each girl should cut out pictures of food from ads and magazines for each of the six food groups; fats and sugars, proteins, veggies, fruits, dairy, and grains. Have the girls glue them into their lids and on top of the pictures glue the number of suggested servings per day.
Voila!


Friday, May 14, 2010

A Mountain Out of an Ant Hill

These colorful little containers of mysterious gel are the coolest things I've seen in a while! (I found them in the $1 bargain bins at Target!) They're little ant farms! I can't tell you how excited the kids were! They LOVE bugs!!!

Finding and capturing the ants...

Checking them out! Yep! They're still in there!


Wait a second...I think mine are escaping! (And they really did! The brilliant little buggers squeezed through the tiny air holes. We ended up covering ours with tape and I will let fresh air in every once in a while)

Way cool!


After only a few hours in their new home they started building their tunnels! Totally awesome!!!


Monday, May 10, 2010

My Hair Pretties

This is a craft that can be as simple as you'd like, or a little more complicated. One that pretty much all little girls will love! It's a hair accessory organizer!


Years ago, I found a dozen of these picket fences at a yard sale for $0.50 each. Originally, I was going to make them professionally and sell them at craft fairs. Since I never got around to making them before I closed my business I figured I'd let the Brownies go ahead and make them.


I've never seen the picket fences before or after I bought them so I don't know where you might find some. BUT you can easily use a simple wooden plaque instead.


I had found all the flower and bug wooden pieces at Dollar Tree, some of them were already painted, some not. You can pick up really nice pre-painted flowers at Michaels or Walmart even.


I let the girls decorate the pieces with glitter glues and rhinestones (rhinestones are a 'must have' for Brownies!) and color the wooden fence with markers. They each also got to pick three pre-cut grosgrain ribbons. I hot glued the ribbons on the back and the hanger on top (they got to choose which ones to put where).


After the meeting you need to spray the fences with a matte finish spray otherwise the marker ink with smudge and run (make sure you do this in a well ventilated area) Be sure to use matte and not glossy, glossy will make it run when it hits the marker. Also, the glossy takes a lot longer to dry and is harder to appy evenly.


At the next meeting hot glue clothespins to the front of the fence, or plaque, and then let the girls show you where they want the pieces to be. Once you glue those on you're done!

Not only could this be used for hair things but also to display favorite swaps from girl scout events!